Depending on your operating system, you can choose:
Part 1: Mode Preparation
After successfully installing the app, iMoveGo offers two modes to cater to your specific needs.
General Mode (Default Mode)
The standard setting for changing your GPS location on most location-based applications, like Find My, Facebook, and WhatsApp.
Steps to Enable General Mode:
- Navigate to Settings About Phone Software Information. Tap the Build Number seven times to unlock developer options.
- Go to Developer Options, select Mock Location App, and choose iMoveGo.
Game Mode
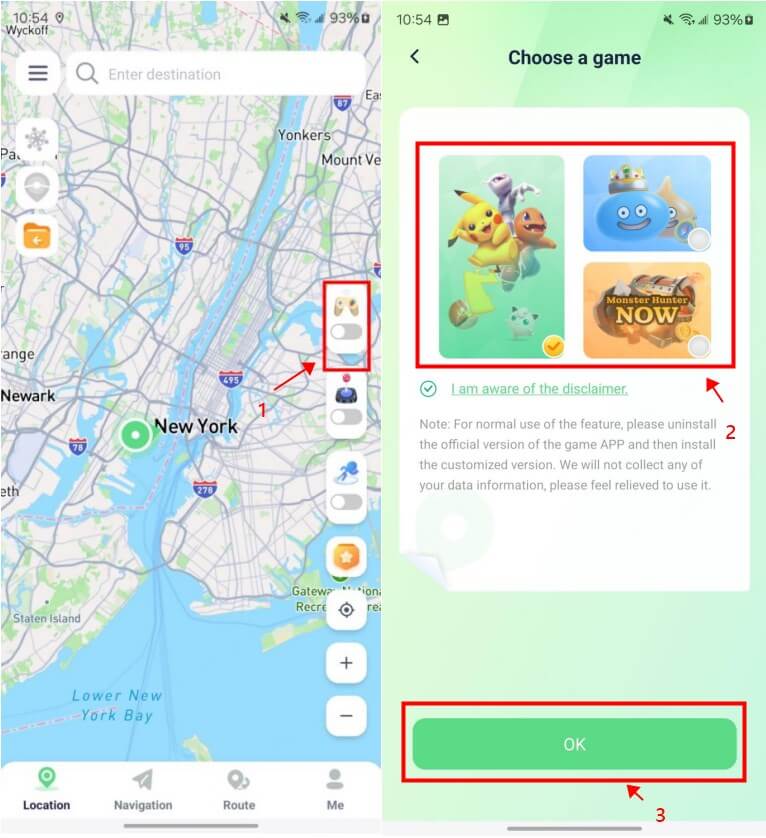
Optimized for AR games like Pokémon GO and Monster Hunter Now, the Game Mode provides tailored functionality for gamers.
Steps to Enable Game Mode:
- Toggle the button on the main interface's sidebar to open Game Mode. Choose your desired game from the selection page and click OK.
- Follow prompts to install any necessary apps, ensuring your location is set before launching the game.
Part 2: Start Changing GPS Location to Android without PC
To fake your GPS location on Android, iMoveGo provides several methods.
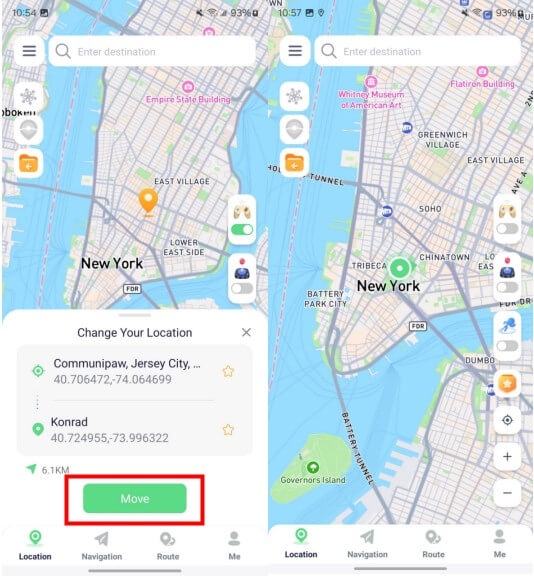
Choose Single Point Teleport
- Long press on the map or input coordinates in the search bar.
- Click the Move button to set your device's location to the chosen point.
Choose GPS Joystick
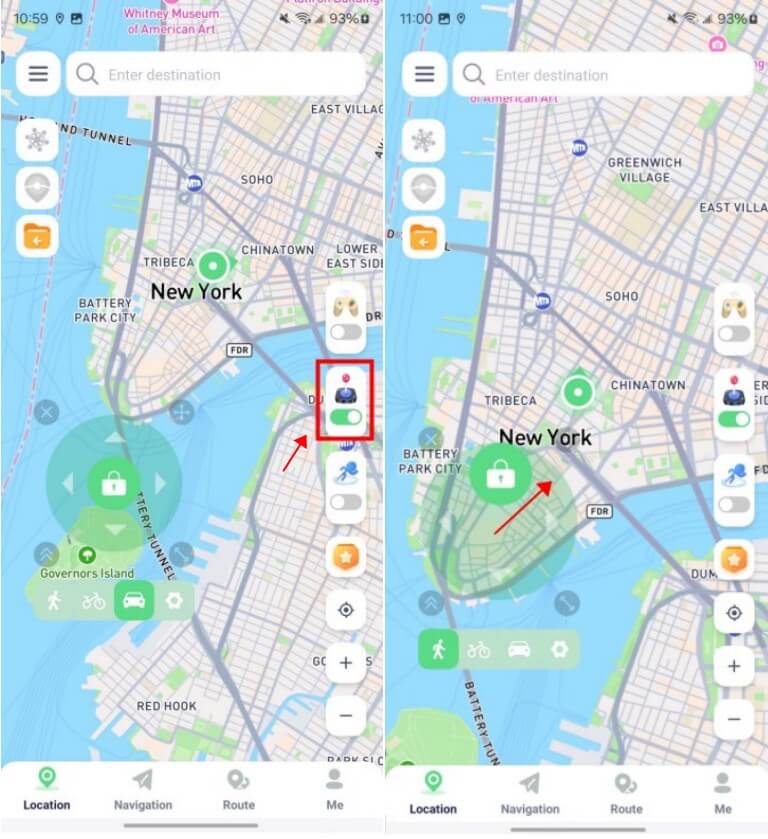
The Joystick Mode offers real-time movement control, making it ideal for AR games like Pokémon GO.
- Enable the joystick feature on the right sidebar. Drag the central ball for 360° movement.
- When locked, dragging it to the joystick panel's edge activates real-time movement. Click the center to unlock and pause.
- You can choose walking, cycling, or driving speeds, or customize your own.
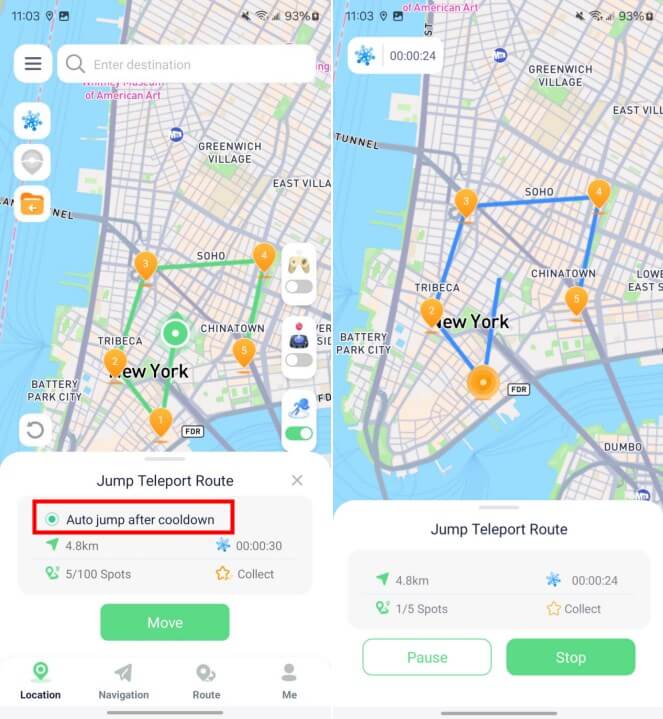
Choose Jump Teleport Route
This mode allows users to plan a route with multiple destination points.
- Activate this feature and select multiple destinations. Click Move to teleport between pre-selected points.
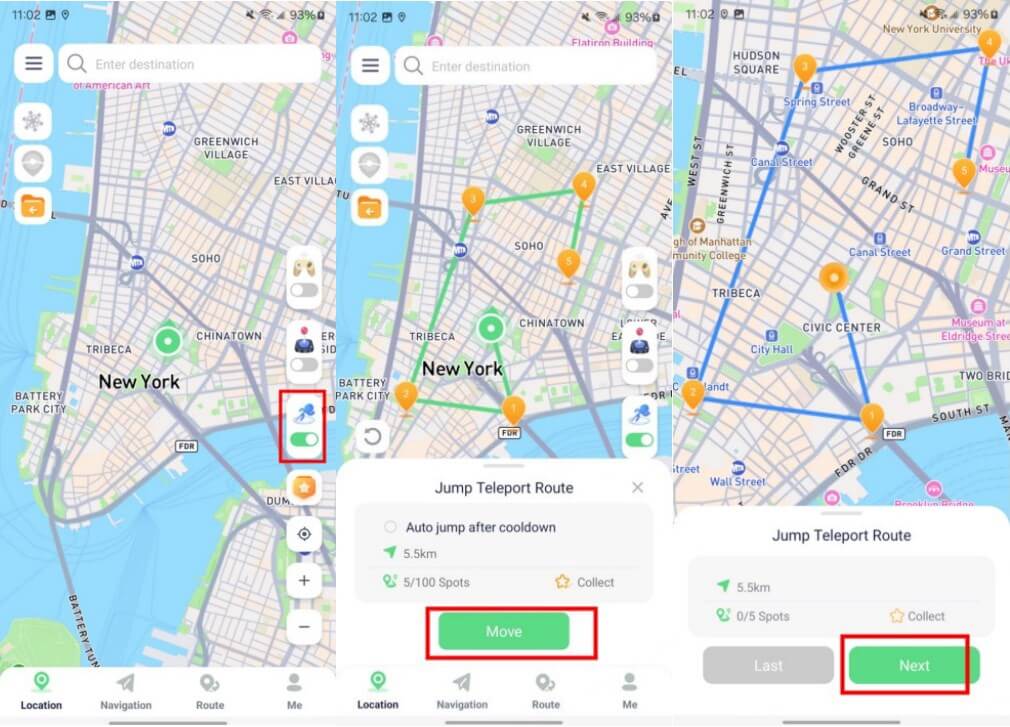
- Optionally enable auto-jump after cooldown for seamless transitions.
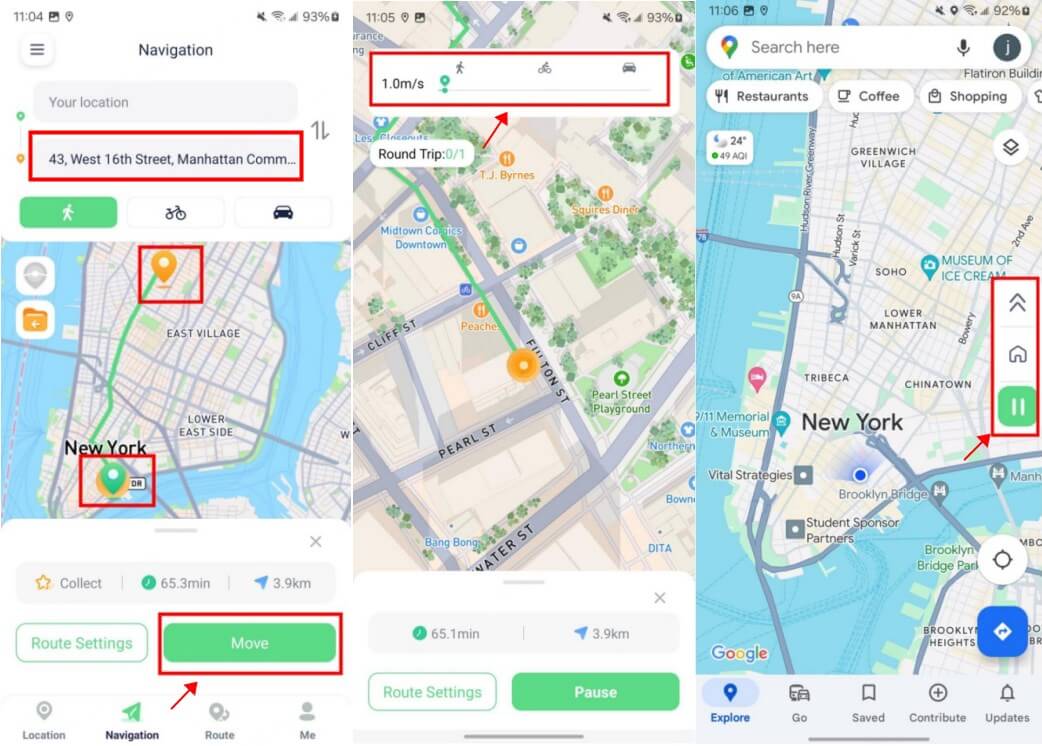
Choose 2-Point Navigation Route
This mode simulates realistic travel between two points on Android devices.
- Select the 2-Point Navigation option. Choose start and end points, then set your travel speed.
- Adjust speed as needed and enable Appear on Top for background operation.
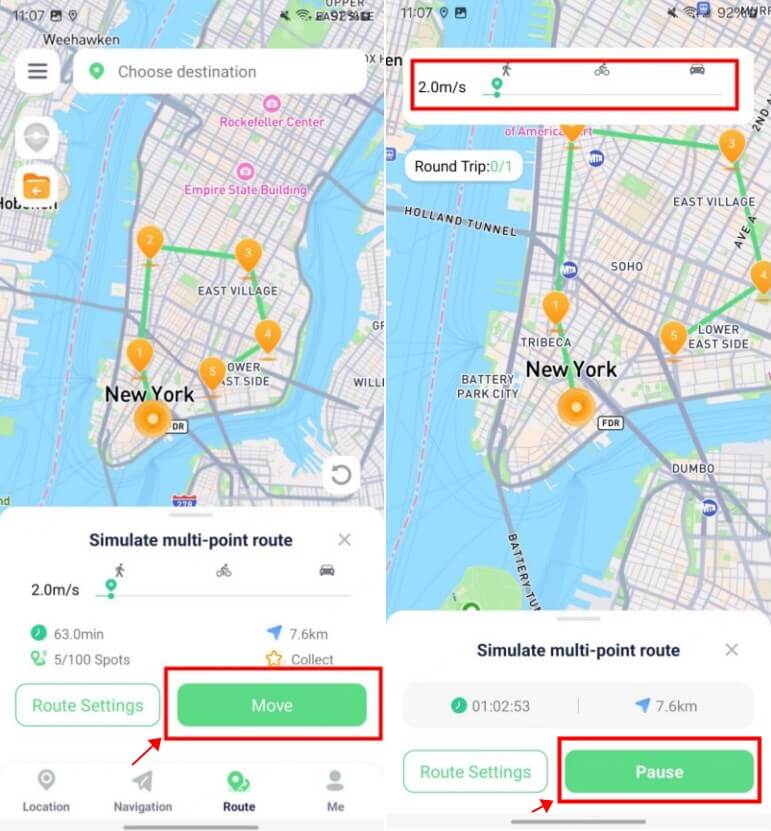
Choose Multi-Point Route
This mode plan and simulate custom routes involving multiple locations.
- Choose the corresponding mode, and select multiple destinations to create a tailored route.
- As with 2-Point Navigation, control the simulation speed and and pause/resume as needed.
Part 3: Special Features
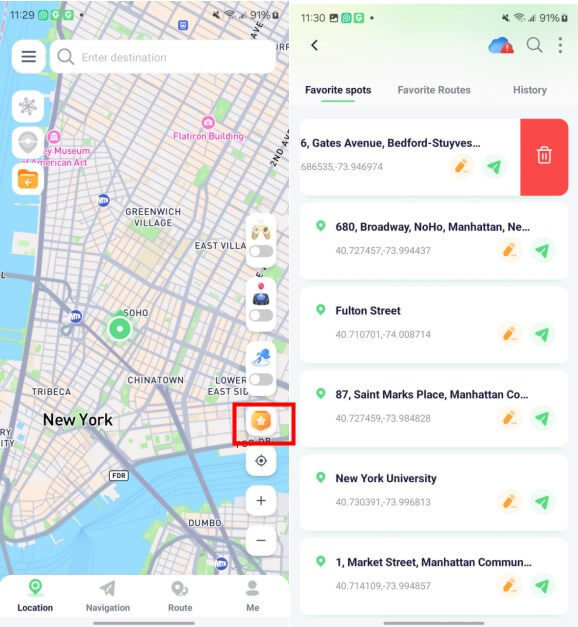
Feature 1:Favorites and History Management
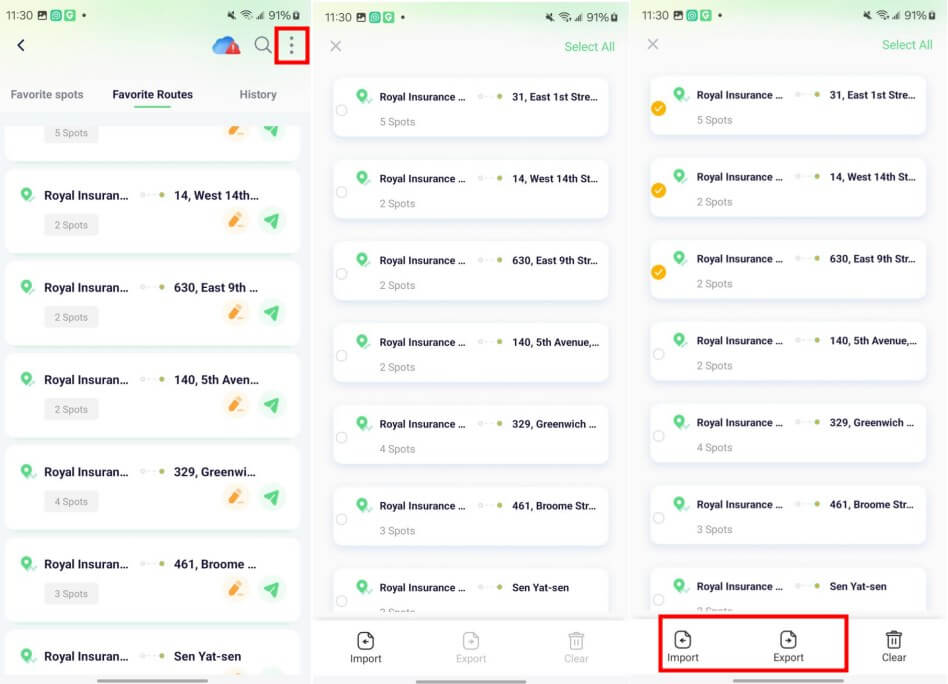
- Favorites Access: Click on the Favorites option in the right sidebar to view your saved spots, routes, and history. Here, you can edit names, navigate directly to a location, apply routes, and delete data. Use the search button at the top to quickly find specific entries.
- Import and Export GPX Files: In the Favorite Routes section, click the manage button to export selected data as GPX files or import new GPX files from your device.
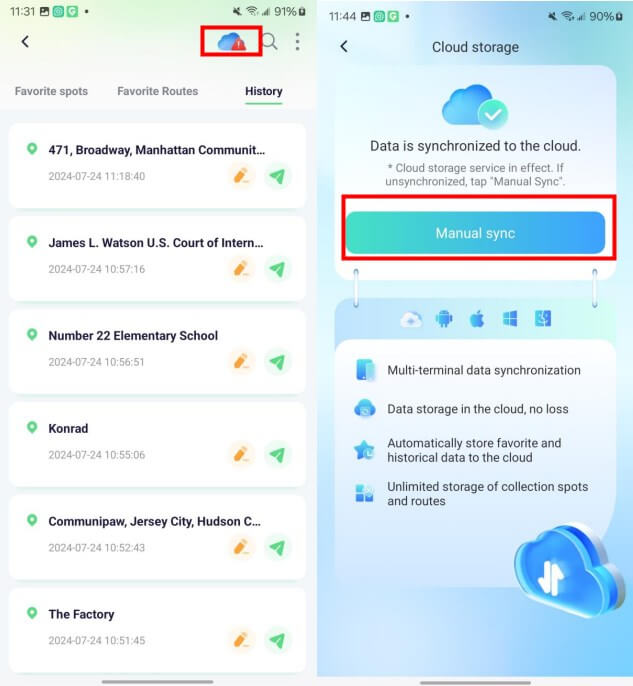
- Cloud Storage Management: Click the cloud storage button to verify if your data is synced. If not, press “Manual Sync” to initiate synchronization.
Feature 2:Cooldown Timer (Game Assist)
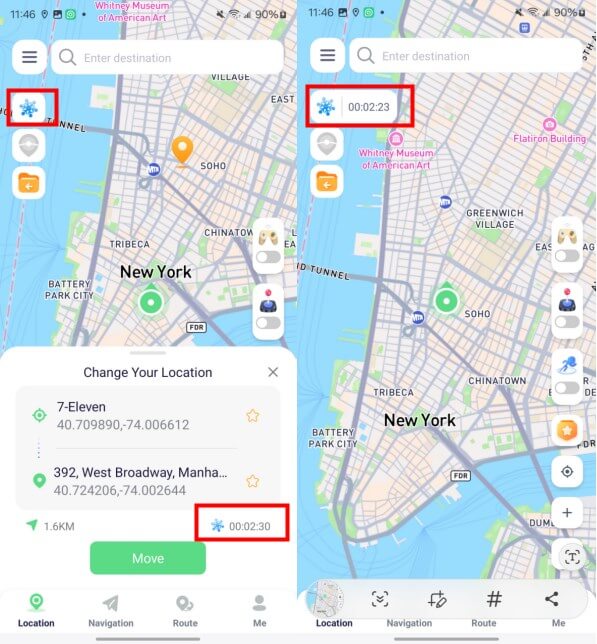
- Turn on the Cooldown Timer from the left sidebar. When you teleport, the timer calculates cooldown based on distance and begins counting down. Avoid performing other actions until the timer finishes to prevent detection.
- If you wish to disable the cooldown timer, simply click the button again.
Feature 3:Import Route
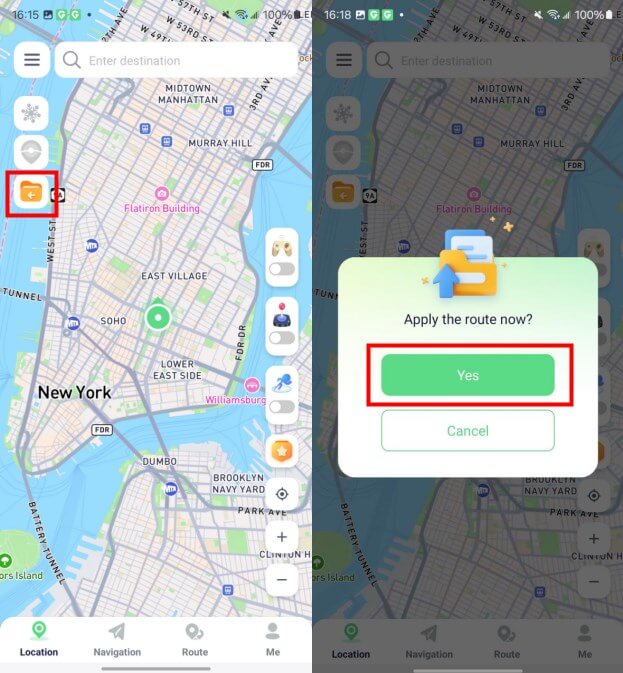
- Click the Import button in the left sidebar to bring in a GPX file from your device, which will then be displayed on the map.
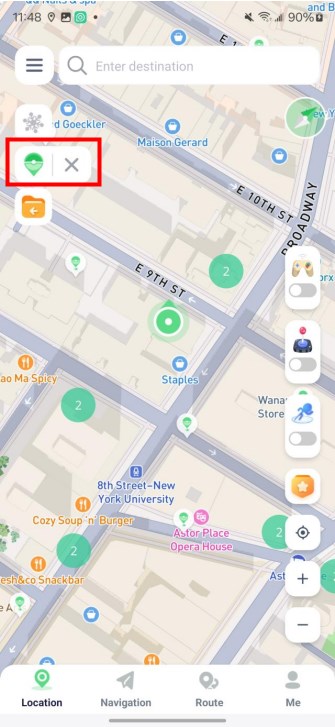
Feature 4:Live Atlas (Game Assist)
- Activate the Live Atlas on the left sidebar to display nearby PokéStops and gyms within a 2 km radius of your virtual location.
- Click to refresh for the latest updates, and visit these spots to gather items or engage in battles.
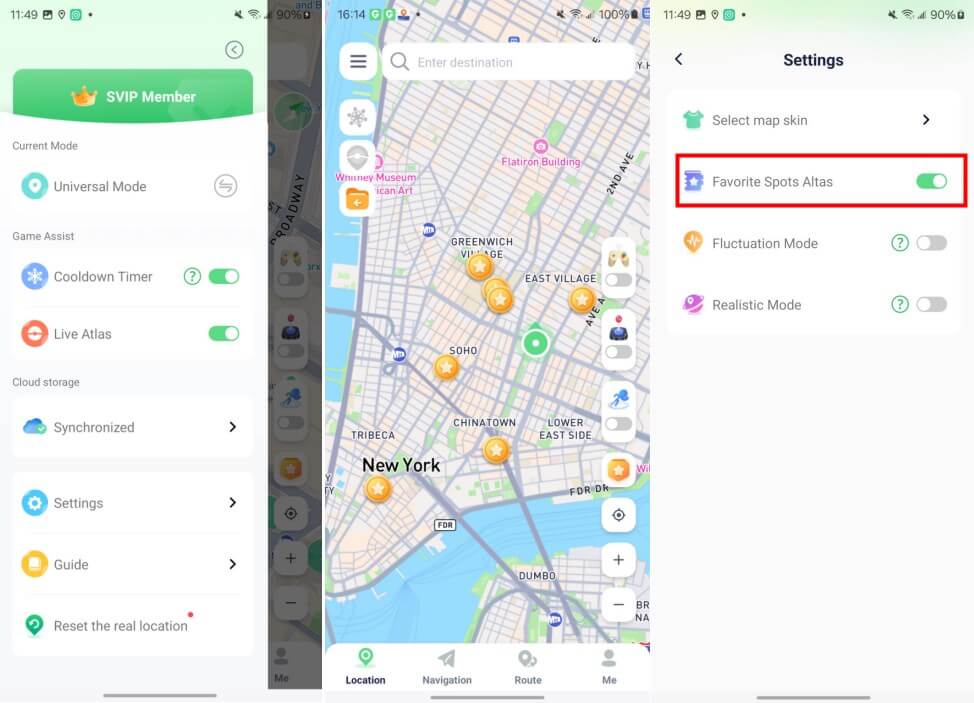
Feature 5:Favorites Atlas
- Swipe left to access the side drawer, then navigate to the settings to enable the Favorites Atlas. This will show your favorite spots on the map.
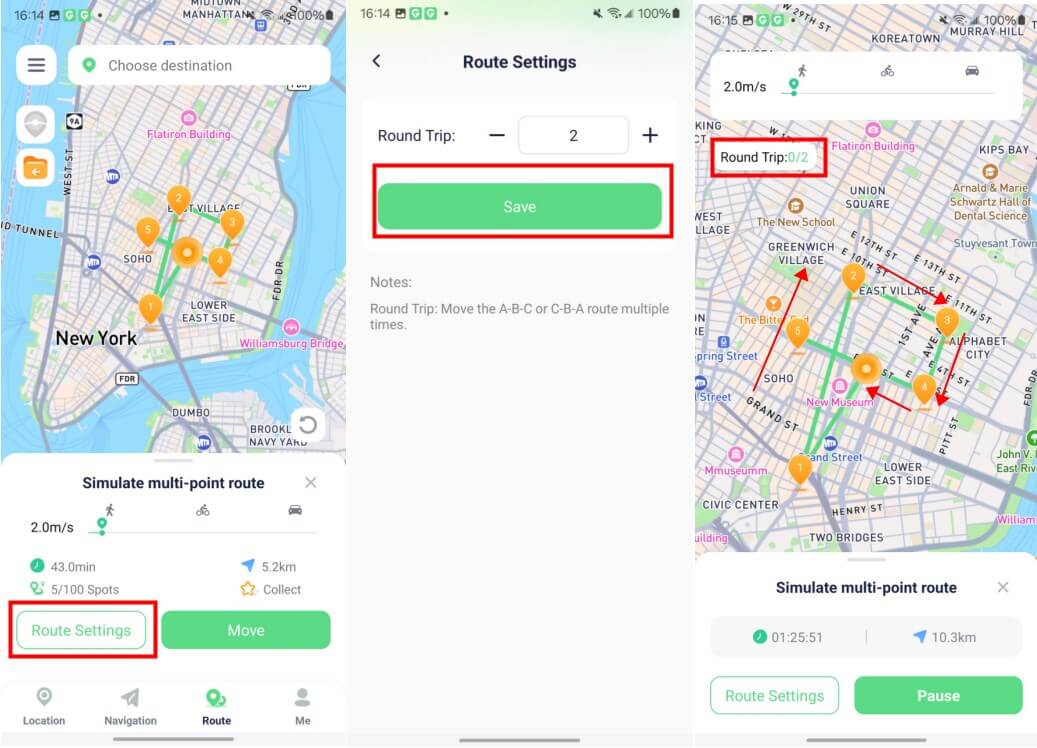
Feature 6 :Round Trip Route
- Go to Route settings to set up two-point or multi-point navigation and specify how many times to complete the route. For example, setting route A-B-C to repeat twice will result in A-B-C-B-A.
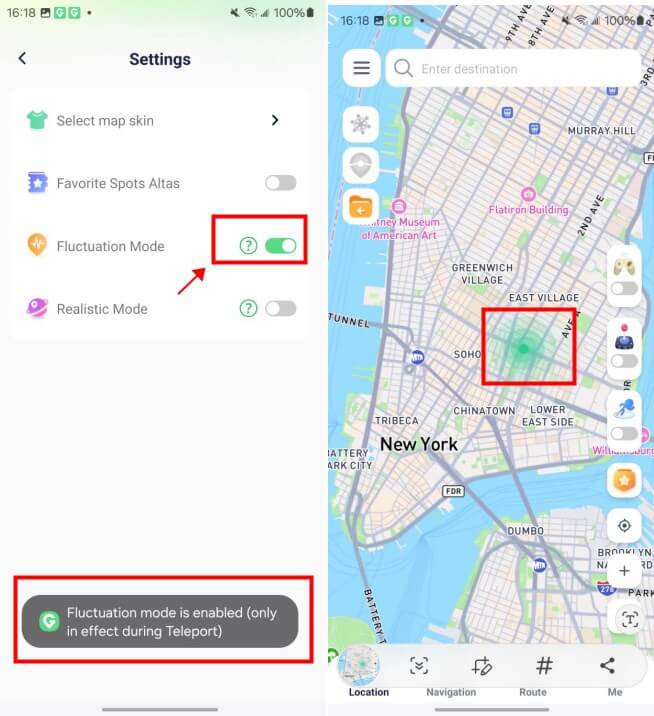
Feature 7:Fluctuation Mode
- Open the side drawer, navigate to settings, and enable Fluctuation Mode.
- This feature allows your virtual location to shift slightly within a few meters while in teleport mode.
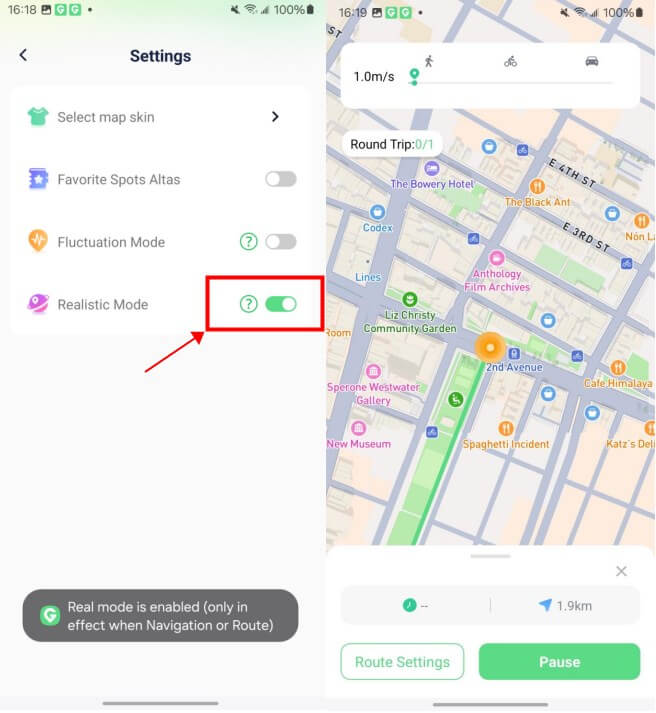
Feature 8:Realistic Mode
- Swipe left to open the side drawer, go to settings, and turn on Realistic Mode.
- This setting randomly adjusts movement speed by up to 30% within your chosen speed range during navigation.
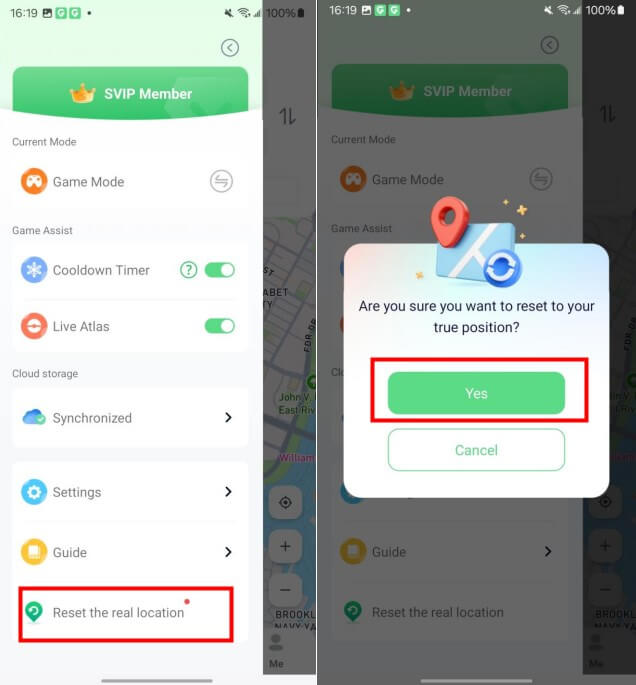
Feature 9:Reset Real Location
- Access the side drawer and select "Reset Real Location" to revert your device's actual location.
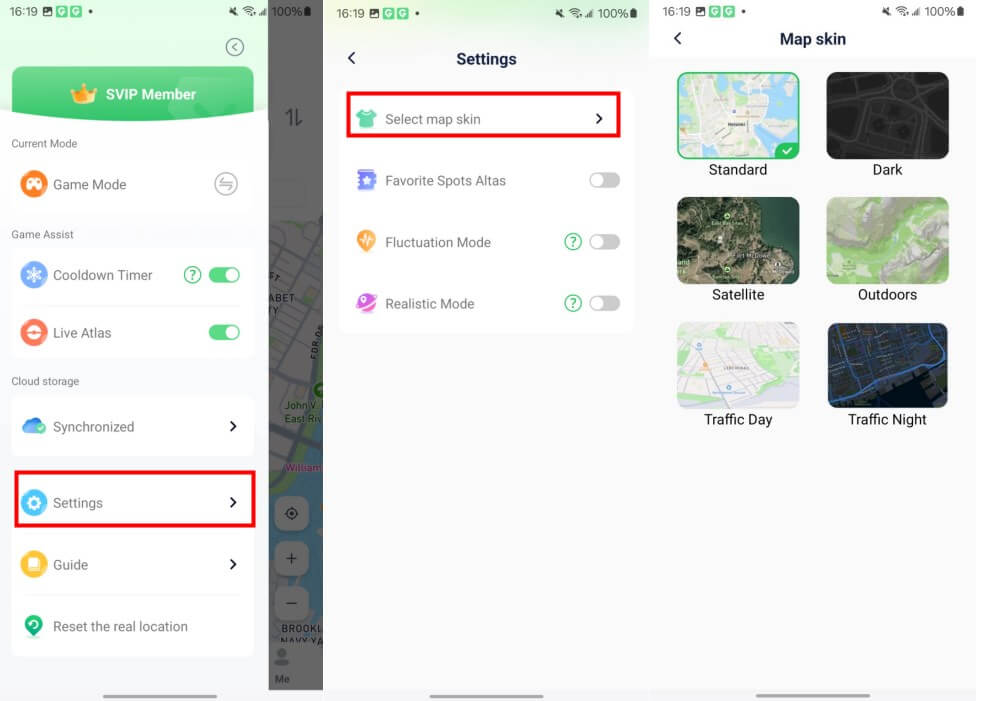
Feature 10:Map Skin
- Swipe left to open the side drawer, navigate to settings, and click on Map Skin to select your preferred map appearance.

Thanks for your kind feedback!


